¶ Getting started
¶ Minimum Requirements
To run the configuration app, you will need a up-to-date system running Windows or Linux. The details can be viewed below:
- Windows (64 bit or 32 bit). At least Windows 10 with a Vulkan/DX12 capable GPU. Most hardware from 2015 should work fine if it is running Windows 10 or newer with updated graphics drivers.
- Linux - (64 bit only). Any distro with AppImage support should work, and hardware that runs OpenGL 2.1 or newer. This includes Virtualbox.
As Linux has a more relaxed set of requirments, if you are running an older Windows system that does not run the configuration app, you can try setting up a Linux virtual machine to run it!
To connect your TCU to the configuration app, you can use the included USB-C cable.
NOTE! If you are using a 2003 or newer vehicle and have a SocketCAN or Passthru compatible adapter, you can connect to the TCU via your vehicles OBD2 port too!
To start with, install the CP2102 drivers if you are using Windows here. If you are using Linux, add yourself to the uucp or dialout group. The group depends on which distro you are using.
Plug in your TCU and make not of the COM/TTY Port that appears in device manager (Windows), or DMESG (Linux)
¶ Attention Linux users
For the configuration app and firmware upload to work, your user must be part of the uucp group. You can do that by entering the following into a terminal:
sudo usermod -a -G uucp $USER
Then reboot or log out and back in.
¶ I've just built my own TCU
If you've just assembled your own TCU, you will need to do a few steps in order to upload the first initial firmware onto your TCU!
Once you have uploaded the firmware, you can then continue from I've received an assembled TCU
¶ Development platform
To begin, install VSCode, NOT FULL FAT VISUAL STUDIO!.
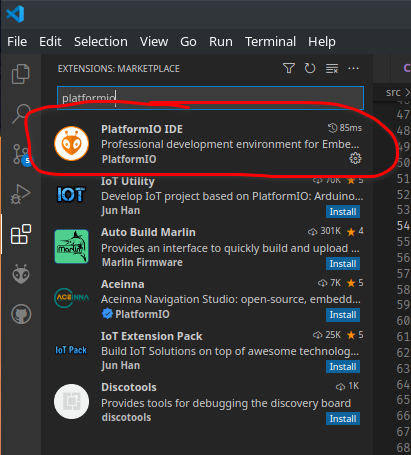
Then, navigate to extensions, and install the 'platformIO IDE' extension for vscode.
Next, clone (Or download) the Ultimate-NAG52 TCU firmware repository from Github via this link, and open the folder within VSCode. PlatformIO now should automatically startup and begin indexing the folder and installing all necessary ESP32 platform software.
Next, open platformio.ini, and change the values of monitor_port and upload_port to whatever your TCU's COM port is.
EXAMPLE: WINDOWS
upload_port = COM4
monitor_port = COM4
EXAMPLE: LINUX
upload_port = /dev/ttyUSB0
monitor_port = /dev/ttyUSB0
Next, press the key combination CTRL+ALT+U, and platformio should begin building and uploading the initial firmware to the TCU!
Important. Upon uploading complete, you will hear the TCU beeping 5 beeps in a loop. This is normal. DO NOT plug the TCU into your vehicle yet! The TCU is currently in fail-safe mode due to the TCU not knowing what board revision it currently is.
In order to rectify this, you will need to run the configuration app, and set the board variant in TCU config:
Next, continue from [gettingstarted/I've received an assembled TCU]
¶ I've received an assembled TCU
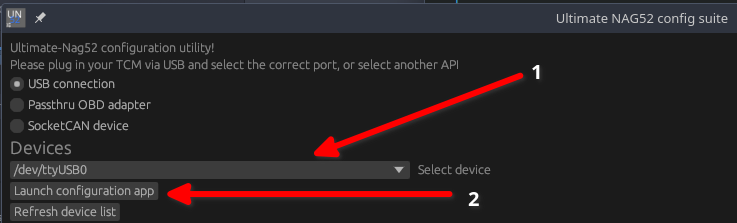
To start with, download the Ultimate-NAG52 config suite. Upon launching, connect to the COM/Serial port of your TCU. You can also use SocketCAN/Passthru adapters for cars that support CANBUS diagnostics. (Mainly W211 and newer).
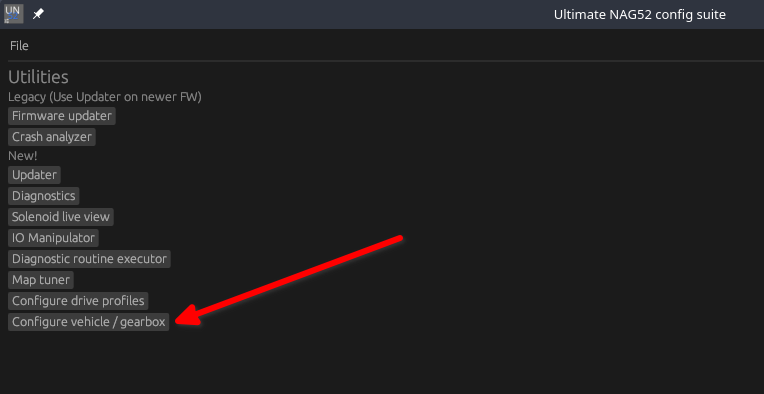
Next, once the app has been launched, go to configure vehicle/gearbox:
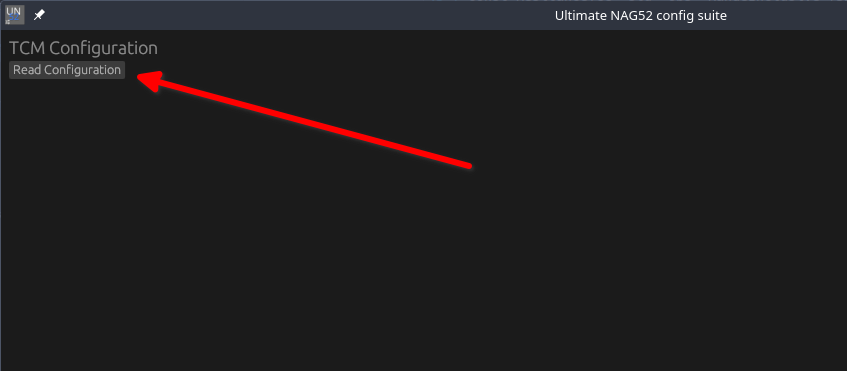
Read the TCUs configuration:
Next, configure the TCU according to your cars settings. A lot of the settings can be derrived from the VIN Table page. Settings such as Large NAG however must be manually researched.
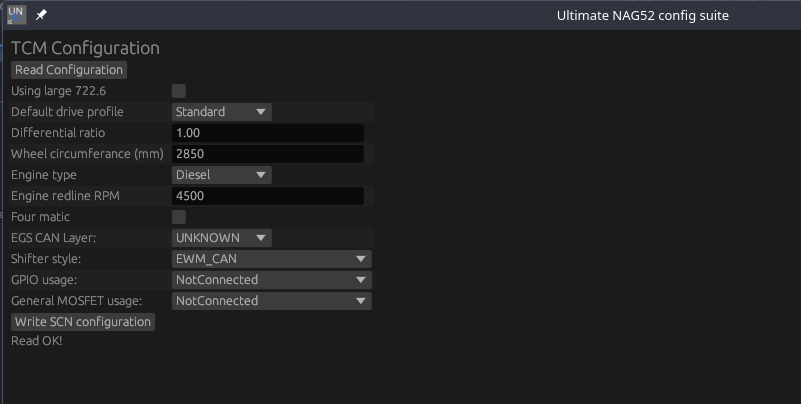
Next, press write configuration to apply your settings!
¶ Applying EGS Calibrations
As off 03/2024, Ultimate-NAG52 TCU requires calibration from an original EGS unit to function (It will be in a beeping error loop until calibration is applied). This is all stored in a database within the config app. To apply the data for your car is fairly simple:
The config app will tell you it is missing calibration by showing the following on the home page:

- Go to
Configure EGS compatibility data- If the app says
FAILED TO INITIALIZE CALIBRATION, this may be due to an outdated app version vs firmware version. Simply check for new updates on the config app home page.
- If the app says
- The config app will show you which calibrations are missing for the TCU to function correctly (See top of image below)
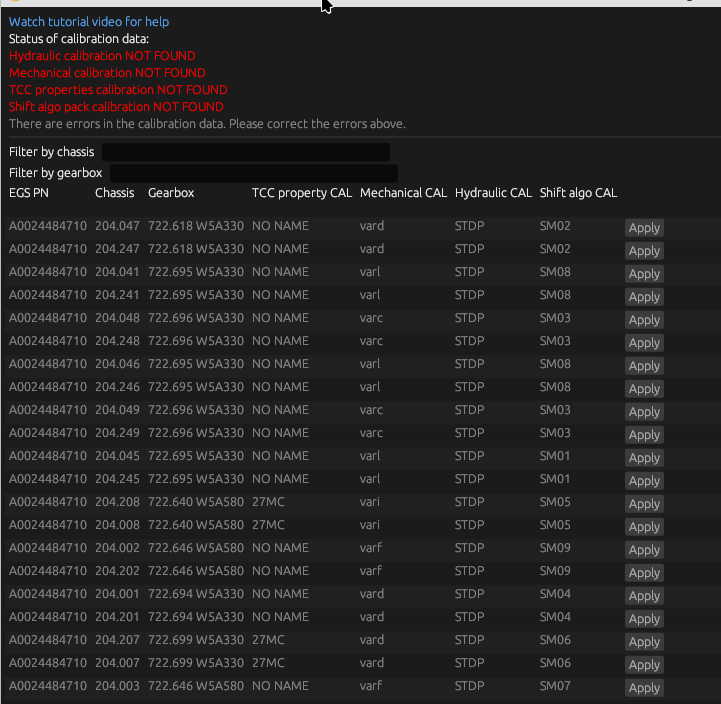
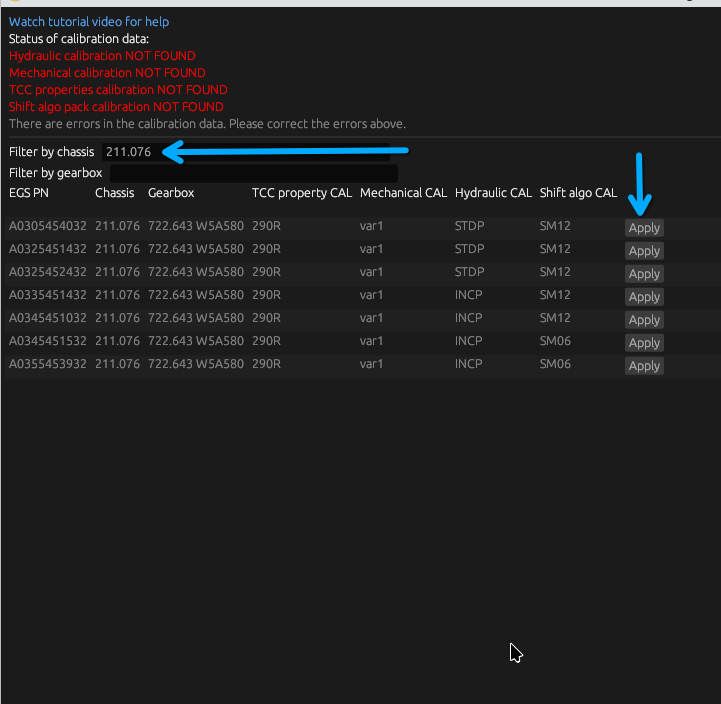
- Filter the list of available calibration sets either by chassis code, or by gearbox type, then press Apply on your chosen set:
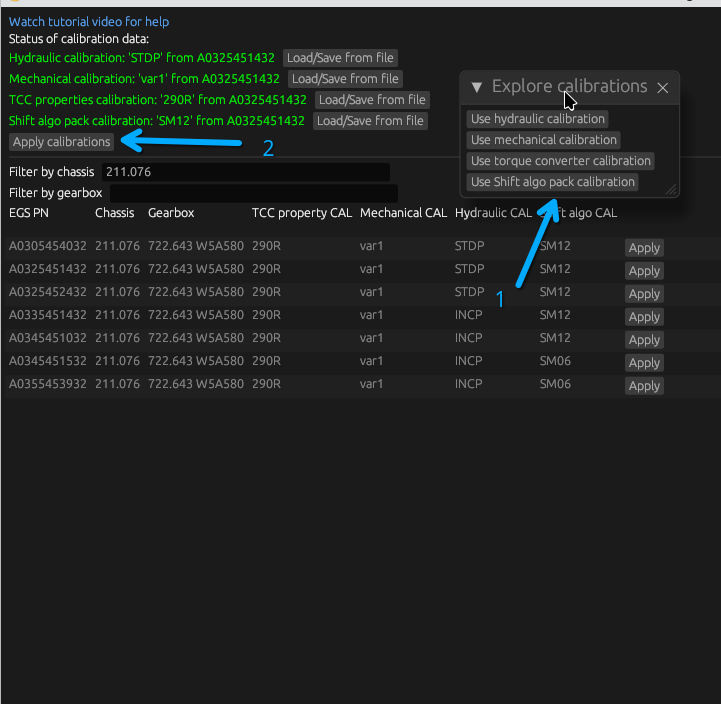
- This will now show a window for you to select each set, and apply it. The status text will now show green once the calibration has been marked. Finally, press 'Apply calibration (2)', and the TCU will reboot
After the TCU reboots, it can be used now!
¶ What next?
Read how to fine-tune the TCU here
¶ Configuration Tips
- If you have ABS/ESP lights on your dashboard after writing the TCU configuration, you likely have chosen the wrong CAN layer. There is some overlap (For example later W210s use EGS52 CAN network instead of EGS51).
- Shifter style can be easily determined. If you have a shifter with 4,3,2,1 on it, you have TRRS, if you have +/- on the shifter, it is EWM.
- Setting the engine redline is only used for Manual/Race profile modes (For automatic engine protection).
- For G class's, enable the GPIO usage as
Inputand setpulses/revto 16.